How To Make Latkes (Super Crispy)
Everyone teaches how to make latkes differently. But my way makes things easier, faster and best of all crispier! My easy 5 tips make tedious latke making a thing of the past!
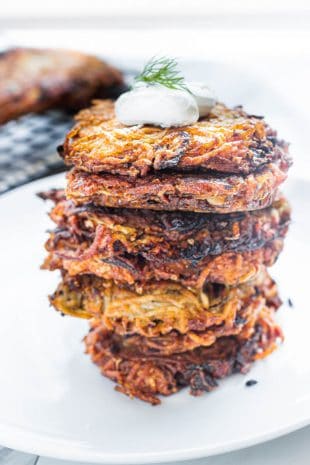
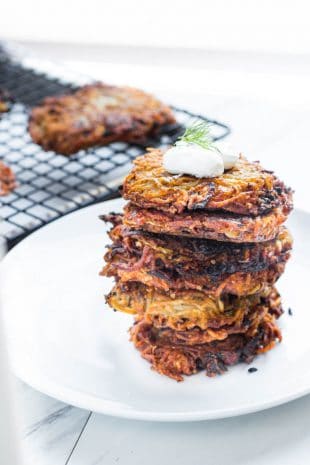
Latke making has become a time honored tradition in many Jewish households, particularly during the holiday of lights…otherwise known as Hanukkah.
The latke tradition is one that I remember well. We did not make them often in my family but when we did it was my babushka who made them. She would hand grate them…season them simply and fry them up. After meeting my husband I realized that it was a time honored tradition in his household for Sunday breakfasts. His mom’s were different…a bit crispier… and thicker. My babushka’s were almost lace-like…I still do not know how she did it…and sadly she never did teach me.
Every mom and grandmother teaches their kids and grandkids their method and who am I to argue with that method. I am here to tell you that I have a way that turns your grandmother’s special recipe into something way simpler and CRISPIER!!!
Learning my method of how to make latkes super crispy only involves 5 signature tips!!! Those tips not only make latke making fast but also way simpler!
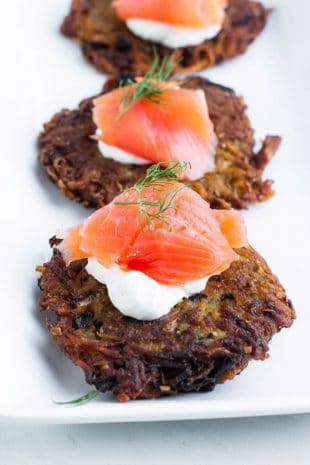
But before we get into that…can we chat about my favorite way to eat these little pieces of potato heaven? I make them into vessels for my beloved lox. Want an elegant appetizer? Easy.
- Make the latke smaller
- Add a squirt of sour cream
- Place a nice heavy piece of smoked salmon or gravlax on top
- Garnish with a dainty pieces of dill or chives.
That’s it boys and girls…whether you celebrate Hanukkah or not… this will be the belle of your ball! Imagine this as a bagel with cream cheese…but crispier and even more delicious.
The Technique
- The Almighty Potato: Alrighty so this is where we make it super easy! We use Russet guys. Good ole’ Idaho, brown potatoes! Now here is the best part YOU DO NOT NEED TO PEEL THE POTATOES. Why? For one it is super duper important to the texture of our latke…and latke are all about the texture. Plus the worst part of the entire task of making latke is peeling. So now that we take that out of the prep list the important part is to ensure that you SCRUB the potatoes. After scrubbing the potatoes, dry them on a towel and see if you can see any more dirt come off. If there is dirt…keep on scrubbing! If there is not…then let’s do this!
- The Food Processor: Remember the days of grating the potatoes by hand? Yea say good bye to that guys…BUH-BYE. We are going to be using our hand dandy food processor! Most comes with the shredding attachment and if yours doesn’t make sure you get a food processor that does! I mean seriously it’s the best addition to latke making! So why is this so important when learning how to make latkes (other than it is making everything wayyyy faster?) Well because you are eliminating a HUGE enemy of the almighty crispy latke…MOISTURE. When grating on the box grater you end up extracting a TON of moisture…which then you have to squeeze out EVEN MORE! Plus it creates a very different texture that results in a more gummy latke rather than a crispy and tender latke! So save yourself the effort…ditch the box grater and instead get yourself a food processor! NOW…here is the kicker…wait until the very last minute to shred your potatoes. Why? Because they are like a ticking time bomb with the oxidization aka browning. Measure out all the other ingredients
- Get Rid of the Moisture: So if moisture is the enemy to crispy latkes with perfect texture than our goal is to extract as much liquid out of the mix as possible. The easiest way to do this is with the help of a trusty cheesecloth. It’s cheap and effective. So how? Place the cheesecloth in a large enough bowl to fit all your potatoes. Make sure you double it up otherwise the pressure of the potatoes when squeezing will tear right through the cheesecloth. Place the potatoes in the cheesecloth and then tie the ends around of a wooden spoon and use the wooden spoon almost like a lever to twist the ends of the cheesecloth. And keep twisting!!! It does take a bit of time and a bit of elbow grease…but it’s well worth it! See all that liquid? We won’t need it…but we will need a magic ingredient hiding underneath 🙂
- Magic Binders: So you have all that liquid left behind… that you can throw out. But what has settled at the bottom…POTATO STARCH! That is our magic ingredient!!!! The natural starch in potatoes is an incredible binder!!! In order to capture it…make sure you pour off all the liquid first and carefully the magic starch beneath will be revealed! When our magic binder combines with our other binders (eggs and matzo meal) it is perfection! Why matzo meal you ask? It adds a really lovely texture (again do you see the pattern here…we are going for texture) and binds it without giving the latkes the gumminess that flour can.
- The Frying : So the frying is obviously a critical point here. Truly this is the moment we have all been waiting for! The 2 most important components here are the oil and the pan. The pan of choice is a cast iron pan. It keeps it hot and even for the entire cooking time. The best part about cast iron is how long it stays at the desired temperature…that my friends is how we get a beautiful even color. Non-stick will work in a pinch but truly get yourself a good cast iron pan…it will be your most used pan! As far as our fat of choice…I always do olive oil. Feel free to use avocado oil or chicken shmaltz if that’s your style. But that’s it, nothing else will do. The other oils are not exactly of the best taste or are they good for you. So let’s stick to good ole olive oil and avocado oil in our cast iron pan to make our ultimate latkes. In terms of quantity, we need the oil to come up about half way up the latkes. The oil is a necessity here…use it. In order to make sure the oil is hot enough, just drop in a piece of a potato shred, if it sizzles nicely then you are good to go!
- The Set-Up: So when you start frying…this is the order of items: bowl, cast iron pan, sheet pan lined with a rack and even better place parchment paper on that sheet pan so there is even less clean up required! Get yourself a good fish spatula to flip these babies with, they are delicate when they are not eat crisped up so a good fish spatula is the best bet! First create a little latke for you to taste. Taste tests are CRUCIAL here…imagine making a huge batch of beautiful little latkes…only to discover they are greatly under seasoned. So fry one up and give it a good taste, season and go on to frying the rest. Form the little latkes and place them carefully into the hot oil, once you see the edges crisp up and get brown, flip them over. I like to use my fish spatula and a fork to ensure that they do not splash hot oil at you when flipping them over. I like to do about 3-4 minutes on one side and about the same on the second side. Once they are done, carefully place them on the sheet pan lined with the rack and allow them to rest just for a few minutes so the access oil can drip off. This is also your last time to season the latkes. I like to add bit extra salt at this point.

So it truly is not that hard to learn how to make latkes. But the tips above are truly what make latkes stand above the rest. They are not blah. They are not mushy. They are crispy, savory and memorable. Again top it with some lox and it is heaven in a bite.

Latkes are kind of that perfect food that you can eat ANYTIME. They are not only perfect on their own or with a dollop of sour cream but you can fancy them up any way you want. Latkes are good when they are warm or even when they are cold. Want to have a fancy breakfast? Top your glorious latke with a poached egg and some hollandaise…boom a fancy eggs benedict 🙂 that will make you the true hero of brunch 🙂
Happy latke making!
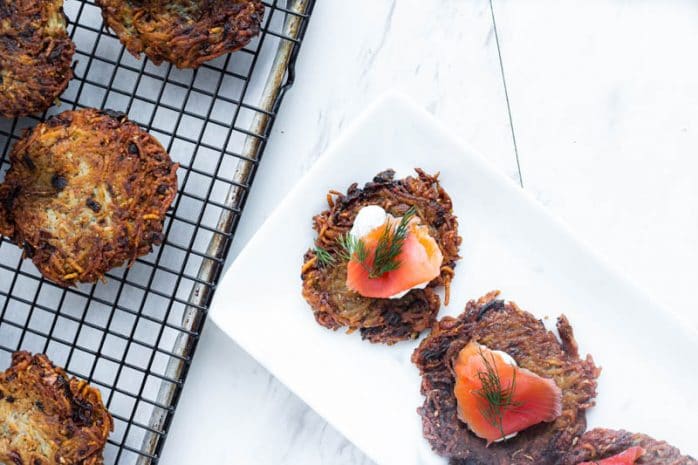
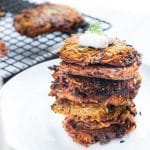
Super Crispy Latkes
- Total Time: 35 minutes
- Yield: 16 latkes 1x
Description
Everyone teaches how to make latkes differently. But my way makes things easier, faster and best of all crispier! My easy 5 tips tedious latke making is a thing of the past!
Ingredients
- 4 1/2 pounds russet potatoes (about 7 medium-large), washed and scrubbed not peeled
- 2 onions, diced
- 4 eggs
- 1 1/4 cups matzo meal (more or less as needed)
- 2 tablespoons kosher salt, to taste
- 1 tablespoon freshly ground black pepper
- Olive oil or Avocado Oill, for frying
- 2 tablespoons chopped chives (optional)
Instructions
- Set up all the ingredients first. That way when the potatoes are all shredded you can combine everything quickly.
- Place the cheesecloth on your bowl so it is waiting on your potatoes.
- Using a food processor fitted with the shredding attachment, go ahead and start processing the potatoes.
- Go ahead and place the potatoes into the cheesecloth and start squeezing them out, using the wooden spoon as a lever. If you would like to make things easier, you can squeeze 2-3 potatoes at a time so that it is easier on your hands.
- Let the liquid from the potatoes stand in the bowl for a bit so the starch can settle to the bottom. In the meantime, go ahead and place your cast iron pan over medium heat and allow it to start heating up slowly. Wash up the area and clean your hands.
- Slowly and carefully pour off all the access potato water so as to not disturb the potato starch.
- Add the potato starch to the potatoes along with the rest of the ingredients (except the oil)
- Add in the matzo meal 1/2 a cup at a time. The mixture is ready when you can form a patty inside your hand.
- Place some oil into the pan and carefully slide in your mini taster latke into your cast iron pan. Taste and adjust for seasoning as necessary.
- Continue frying until all the latkes are fried. Season with salt after removing and while still hot (this is the last time to season). Allow to rest so any access fat drips off and serve.
Notes
1. Make sure the shredder attachment is facing up. Just look for the writing on the attachment and you will know which way is up.
- Prep Time: 15 minutes
- Cook Time: 20 minutes
Keywords: Jewish food, latkes, potato pancakes, comfort food



Up a notch: Thinly slice a couple of shallots and fry in the pan you are going to fry the latkes in. Add the fried shallots to the potato mixture then fry them in the oil you fried the shallots in.
Thanks for the tip!
I am drooling over here – this looks so good – I’m loving this – simply delicious! Such a soul-satisfying dish!
They are always a classic!