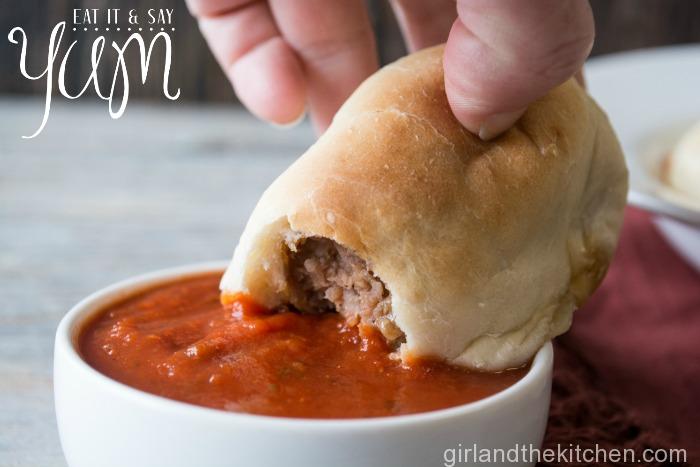
How to Make Chicken Kiev
Learning how to make chicken Kiev is actually quite simple. It is simply a breaded and stuffed chicken cutlet that is fried to perfection and oozes buttery goodness! What can be better?
The Origin of Chicken Kiev
For decades the origin of the famous Chicken Kiev was a constant debate. Was it born in Kiev? In Moscow? In Paris? It is easy to see how a buttery and bubbly deep fried piece of succulent chicken belongs to the fridgid areas of Ukraine, but there is more to the story. In the late 1840’s, Russian royalty would send their chefs to Paris to study under their magnificent chefs. It is believed, that the chefs learned how to make a rendition of Chicken Kiev in Paris. It makes sense…think of the famous Chicken Cordon Bleu. That dish is also made in a similar technique… pounded out meat stuffed with cheese and ham. So it only seemed natural to do a similar variation of this dish. However the French version was not made with chicken but instead…veal. When the chefs came back to Kiev, they decided to escalate the dish and instead make it with chicken, rather than veal. At the time, chicken was actually considered to be a higher prized meat. And the rest as they say is history…
My Chicken Kiev Obsession
My obsession with Chicken Kiev started when I was 8. My mom would buy these incredibly delicious frozen Chicken Kiev’s. They were everything I wanted and required a few minutes in the microwave. Every time I made it for myself, I would burn my mouth with the scalding butter inside…but it was worth it. Most interestingly, it did not have dill or parsley butter but instead it had a chive butter. Rather unusual but years later when years later I started thinking about to how to make Chicken Kiev, it was this flavor profile that forever imprinted itself on my culinary mind. That’s why my recipe for Chicken Kiev stays true to that memory — perfectly crispy on the outside with a rich, flavorful butter filling that melts beautifully when cut.
The Technique
- Time Consuming VS Difficulty: Let’s talk about one very important part of learning how to make Kiev Kotlet while the technique is quite important it is slightly time consuming. That being said we need to be able to distinguish the difference between time consuming and difficult. Time consuming means that we are just taking time to do the necessary steps required for the dish. There is absolutely nothing terrifying or particularly difficult about the technique. In fact, it is quite easy once we lay out the steps.
- Chicken Cutlets: In this recipe, we use chicken breast. Chicken breast lends itself quite nicely to being pounded out thinly. We need it to be thin similar to our Chicken Marsala and Chicken Piccata recipes. In those recipes, our goal is to make them thin so they cook faster. While that is true in our Chicken Kiev recipe it would be more accurate to say that the reasoning behind pounding them out thin is to easily stuff them with our compound butter. I like to pound them out under plastic wrap or parchment paper to avoid the mess. But if you want to make your life even easier, find yourself an awesome butcher who will gladly do that for you. You can usually place an order ahead of time and the hardest part of the recipe will be done for you!

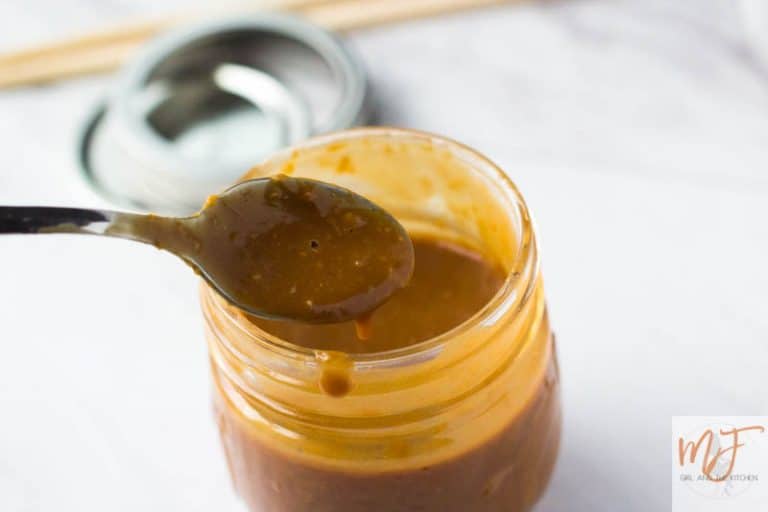
- The Compound Butter: A compound butter is just a butter that is mixed with other ingredients while it is in the softened stage. Our compound butter includes butter, salt, pepper, lemon zest, chopped dill and chopped chives. Everything is combined in a bowl and then it is wrapped up in parchment paper and placed back in the fridge until it is a solid. This butter is then placed in the pounded out chicken and wrapped up.

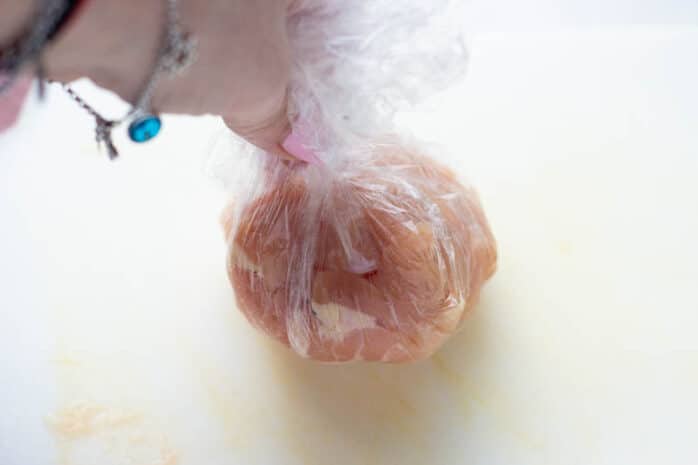
- Wrapping Up the Chicken: Here is where things get real important! Remember how we had to have nice thin cutlets? This is why. We are going to carefully wrap the chicken around the butter so that it is completely covered. I had small chicken cutlets so I could not make the classic long/oval shape so I made balls. However if you have large chicken cutlets, you can place the butter inside the cutlets and wrap it up like a burrito, folding the sides in first then rolling it up tightly. Regardless of the shape, once the butter and chicken is rolled up, we have to roll saran wrap around the chicken. Do so very tightly so that the chicken roll holds its shape. This is very important in learning how to make Chicken Kiev. This step will ensure that the chicken retains its shape after it has been fried or baked.
- Freezing the Chicken: Once we have wrapped up the Chicken Kiev nice and tight, we have to ensure that it holds its shape. We do this by placing it into the freezer for 30-60 minutes. This will firm up the chicken and also the butter. Even if the chicken could hold its shape without freezing, the butter would seep out while frying or baking due to the temperature of the oil. By freezing the chicken we ensure that both the chicken and the butter stay in place just like a Chicken Kiev frozen before cooking for the perfect crispy texture.
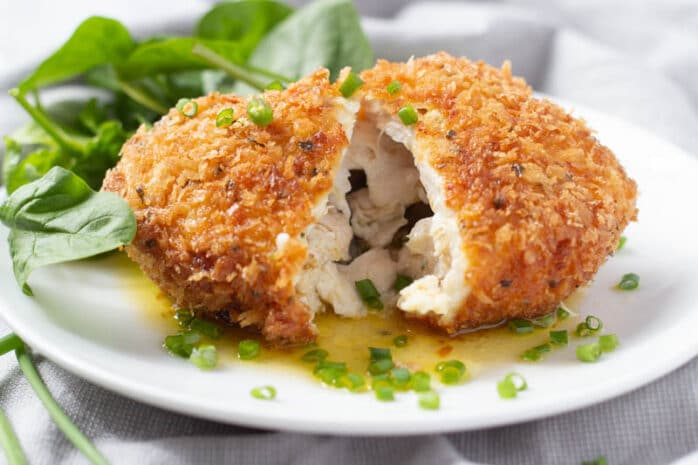
- Breading the Chicken: The next part is what gives our chicken its signature crispy crust. We simply bread the chicken in the classic French breading: seasoned flour, eggs and seasoned panko bread crumbs. I like to keep it simple and just do salt and pepper in the flour and bread crumbs. And if I am feeling extra fancy I add in a bit of lemon zest to the breadcrumbs. Then set into the freeze once again for 30 minutes. You can totally do this part, then place into the fridge until ready to fry or bake! Great make ahead tip!

- Frying or Baking That Is The Question: Alright so…the ultimate crust will come from deep-frying. That being said…it is not the end all! You can bake them or Air Fry them in your Air Fryer! In order to successfully air fry or bake them you must ensure that there is air circulating all around…hence why the air fryer is such a great option. But, you also must ensure that fat covers your chicken so that it can brown up beautifully. So spray those babies down with spray oil or even better, brush them down with some melted butter. The results with Chicken Kiev air fryer cooking aren’t quite the same, but it is a healthier option. However, if you are going to go with the classic deep frying technique, remember you can use avocado or olive oil because we are not going above 375 degrees Farenheight. You can use a candy thermometer to see when the temperature reaches 375 degrees. But my favorite way to test the oil is to drop a bread crumb into the oil and see if the bubbles pop at the surface. If they do we are ready to place our Chicken Kiev in there. Here’s the deal…we are only going to deep fry the Chicken Kiev frozen for 2-3 minutes, just until they are gloriously brown. Then we finish them in the oven at 375 degrees for 12-15 minutes or until the internal temperature reaches 160 degrees F.

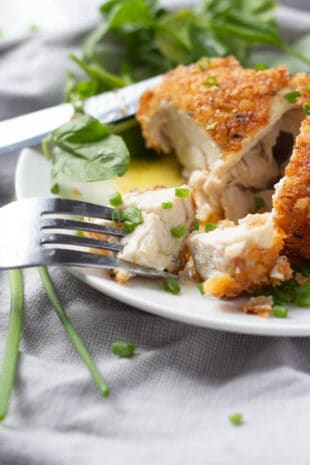
The best part of the this dish is that it is always delicious. And I always say while this may be slightly time consuming it is not difficult. It is actually satisfying to be honest. When you slice into that glorious chicken breast and just watch that golden butter roll out… you know it is all worth it!
Equipment Needed
- Mallet: In the event you do not buy the thin cutlets, this comes in very handy!
- Spatula
- Sheet Pans
- Mixing Bowls:

How to Make Chicken Kiev
Description
Learning how to make chicken Kiev is actually quite simple. It is simply a breaded and stuffed chicken cutlet that is fried to perfection and oozes buttery goodness! What can be better?
Ingredients
Garlic Butter:
- 6 Tbsp Unsalted Butter
- 2 Tbsp Chives Chopped Finely (see note 1)
- zest and juice of half a lemon
- 1/4 tsp Salt
- 3 Garlic Cloves, Minced on a Microplane
Chicken Kiev
- 2 Chicken Breasts (7–8 Ounces Each) Thinly Pounded (see note 2)
- 1/4 tsp Black Pepper
- 1/2 tsp Kosher or Sea Salt
- 1/4 tsp black pepper freshly ground please
- 1 egg and 1tbsp water lightly whisked with a fork
- 1/2 cup of flour
- 1 cup panko breadcrumbs
- Oil for Frying (see note 3)
Instructions
- For the garlic butter filling, combine all the ingredients in a bowl and taste for seasoning, adjust as necessary.
- Place the butter mixture on parchment paper and form into a roll. Place into refrigerator until firm.
Notes
- Use scissors to cut up your chives much faster!
- Most butchers will pound out your chicken for you! In fact even the meat counter in your grocery store will sometimes do it if you just ask nicely.