
How to Make Puffed Rice Cereal at Home: A Crunchy, Simple Delight
If you’ve ever poured a bowl of puffed rice cereal and felt that satisfying crunch in every bite, you’re not alone. This light, airy breakfast staple has been a sweet favourite for generations—and the best part? You can make it yourself at home with just a few ingredients and some kitchen basics.
Whether you’re looking to cut down on processed foods, experiment with homemade snacks, or simply curious about how puffed rice is made, this guide will walk you through every step. It’s easier than you think—and surprisingly fun too.
What Is Puffed Rice?
Puffed rice is just what its name implies—rice that has been heated to the point where every grain expands and becomes light and crunchy, making this a delightful recipe. It is produced by cooking the rice first, drying it out thoroughly, and then subjecting it to extremely hot temperatures (usually through deep frying or with an extreme-heat air treatment). The abrupt exposure to the heat makes the moisture still present within the grains quickly expand, “puffing” the rice into light, crunchy morsels.
This humble transformation has been featured in worldwide cuisines for hundreds of years. It is found in Indian snacking dishes such as bhel puri. It occurs in street sweets in Latin America. It became popular in the United States in breakfast bowls and in crispy snack bars.
Homemade puffed rice provides the same tasty crunch as granola without any of the additives—and it’s far more versatile than cereal alone.
Why Make Puffed Rice at Home?
Let’s discuss the why first before jumping into the how.
- No additives or preservatives: You decide what gets in (and what does not).
- Budget-friendly: A small quantity of dry rice produces surprisingly big quantities of puffed cereal.
- Customizable: You can spice it, sweeten it, or convert it to chocolate-covered delights.
- Satisfying: There are few things as satisfying as creating your own pantry basics.
Additionally, it is a fun activity to do with friends or kids; watching the rice puff up in hot oil can be considered a small science project at home.
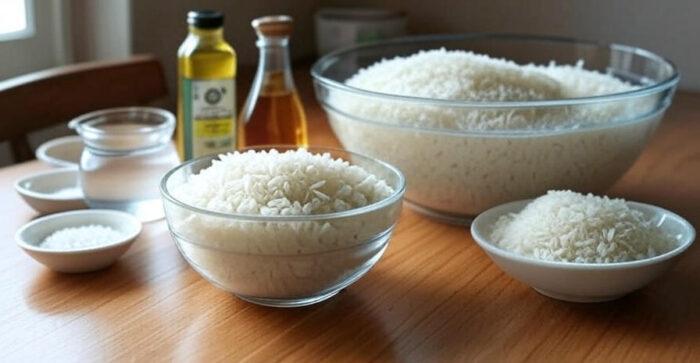
What You’ll Need
To make puffed rice cereal, you only need a few ingredients and tools:
Ingredients:
- 1 cup uncooked rice (white jasmine, basmati, sushi rice, or short-grain all work)
- Water (for boiling)
- Neutral cooking oil (canola, sunflower, or vegetable)
- Optional: Salt, cinnamon, sugar, or maple syrup for flavor
Tools:
- Medium saucepan (for cooking rice)
- Baking sheet + parchment paper (for drying)
- Large, heavy-bottomed pot (for frying)
- Thermometer (optional, but very helpful)
- Slotted spoon or wire mesh strainer
- Paper towels (for draining)
- Airtight container (for storage)
Step-by-Step Guide: How to Make Puffed Rice
Step 1: Cook the Rice
Begin to prepare the rice according to the usual procedures. Wash it well to get rid of extra starch and then boil it in water until it is cooked through but not mushy. Drain and place the rice on a tray or flat surface to cool.
💡 Tip: Overcooked or mushy rice won’t puff well. Aim for tender but firm grains.
Step 2: Dry the Rice
This is the key step. Lay the cooked rice out in one layer on a sheet lined with parchment. Put it in an oven at 250 degrees Fahrenheit (120 degrees Celsius) and bake for 2 to 2½ hours. You are trying to dehydrate the rice completely.
When you’re finished, the rice should be hard and dry—like little pebbles. It is best to let it completely cool first.
🕒 Don’t rush this step. Any leftover moisture will make puffing inconsistent and messy.
Step 3: Puff the Rice
Heat 1–2 inches of oil in a deep pan on medium-high heat. If you do happen to have one, get to 400–425°F (200–220°C).
Testing the oil: Add a few grains—if they puff up at once and rise to the surface, it’s ready.
Now, adding the dried rice small batches at a time (½ cup at a time), being able to watch it puff in an instant. Remove it at once with the slotted spoon and drain onto a tray lined with paper towels.
⚠️ Safety tip: Always be cautious when working with hot oil—keep children and distractions away from the stove during this step.
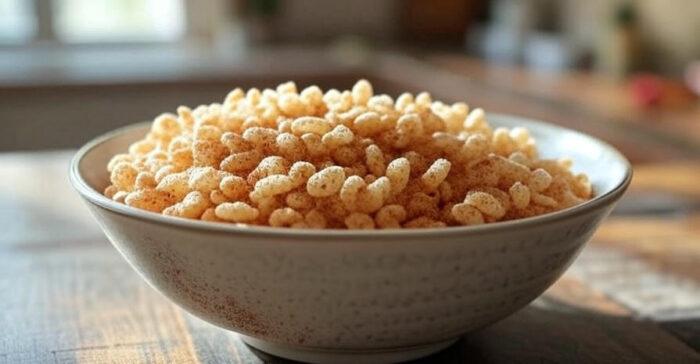
Step 4: Cool and Store
Once cooled, transfer your puffed rice to a sealed container. Store in a cool, dry place. It should stay crispy for up to 1–2 weeks.
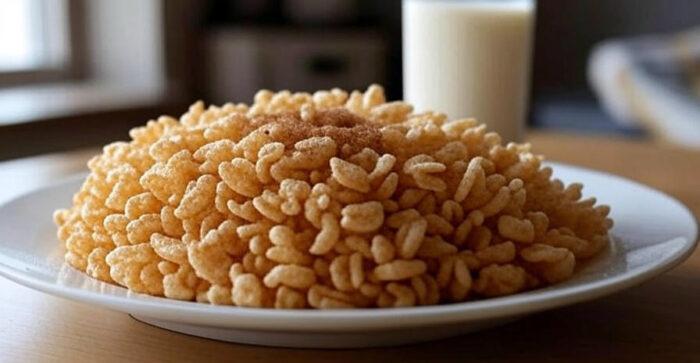
How to Use Homemade Puffed Rice Cereal
Here’s where the fun begins. Once you have your puffed rice, you can enjoy it in countless ways, including with chocolate :
1. Classic Cereal Bowl
Add milk or a non-dairy alternative, a touch of honey or cinnamon, and sliced fruit for a simple and wholesome breakfast.
2. Healthy Snack Mix
Combine with nuts, seeds, coconut flakes, and a drizzle of maple syrup for a DIY trail mix.
3. Chocolate Treats
Mix puffed rice into melted chocolate bars, spread it on a tray, let it set, and cut into squares. It’s like a homemade candy bar!
4. Yogurt and Smoothie Bowls
Use as a crunchy topping for added texture in yogurt parfaits or smoothie bowls.
5. Savory Sprinkle
In Indian cuisine, puffed rice (known as “murmura”) is often used in savoury snacks like bhel puri. You can season it with spices, herbs, and a bit of salt for a savory twist.
Final Thoughts
Preparation of homemade puffed rice cereal is easy, inexpensive, and surprisingly gratifying, making it a perfect quick snack . Once you’ve perfected the procedure, you can experiment with flavors, applications, and even package it in small jars to present to friends or family as a gift. It’s an ideal way to reconnect with the essentials and find how much fun homemade food can be.
The next time you need something light, crunchy and just a bit nostalgic—try whipping up a batch from scratch. You’ll be amazed at how much better it compares to the boxed variety.